Scheduling a report in Brightflag allows you to automatically send report data by email or SFTP at a set frequency (for example daily, weekly, or monthly).
Step 1 — Open the Report Builder
- Go to Menu → Reports → Report Builder
- Locate the report you want to schedule.
💡 Tip:
The report must already be saved before it can be scheduled.
Step 2 — Schedule the Report
- Find the report you want to schedule.
- Click the three dots (⋮) beside the report.
-
Select Schedule.
This will open the Report Scheduler.
Step 3 — Configure the Report Schedule
In the Report Scheduler, configure the following settings.
Select the Report
- Choose Report Builder as the report type.
-
Select your saved report (or a public company report).
Choose the Export Format
Select the file type the report will be delivered in, such as:
- CSV
-
Excel
Set the Start Date and Time
Choose when the report should run for the first time.
Choose the Frequency
Select how often the report should run.
Common options include:
- Daily
- Weekly
- Monthly
-
Custom frequency (hours)
💡 Example:
8766 hours ≈ 1 year
You can also schedule reports to run:
- On the same date each month
- On the last date of each month
Choose the Date Range
Select the time period the report should report on.
Examples:
- Last 7 days
- Last 30 days
- Last month
You can also enter a custom number of hours.
💡 Example:
8766 hours ≈ 1 year
Step 4 — Add Recipients
You can deliver the scheduled report by email or SFTP.
Send by Email
- Click Choose Email Recipients.
- Enter the email address.
- Click Add.
You can add:
- Multiple recipients
- CC recipients
📌 Recipient limit:
Up to 50 recipients can receive the report.
Send by SFTP
To send the report to an SFTP server:
- Click Specify an SFTP Server
- Select the configured SFTP destination.
➡ See SFTP Integration Setup for more details.
Step 5 — Save the Schedule
Once all settings are configured:
- Click Save
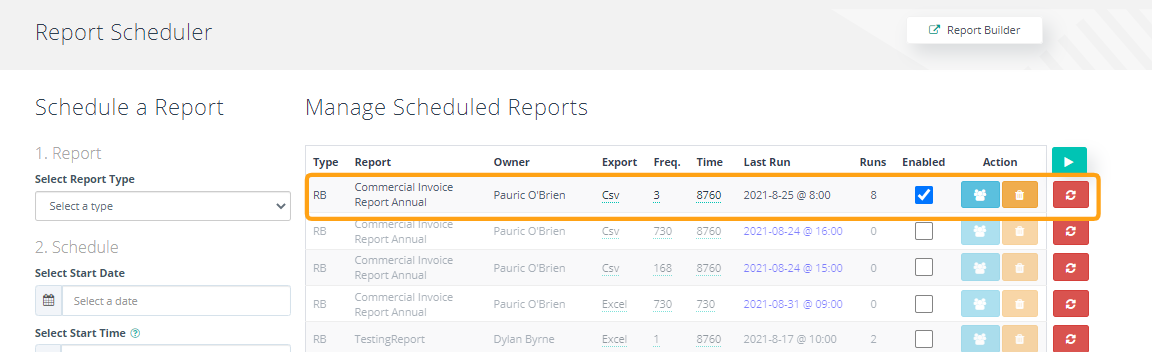
Your scheduled report will now appear under:
Menu → Reports → Report Scheduler → Manage Scheduled Reports
Important Notes
📌 Report access
The data included in a scheduled report is based on the permissions of the user who schedules it.
If a colleague should receive a report with restricted access, they must schedule the report themselves.
📌 Year-to-date Reporting
Please note that at this time the scheduler does not support year to date reporting.